Free Shipping On Orders Over £50!
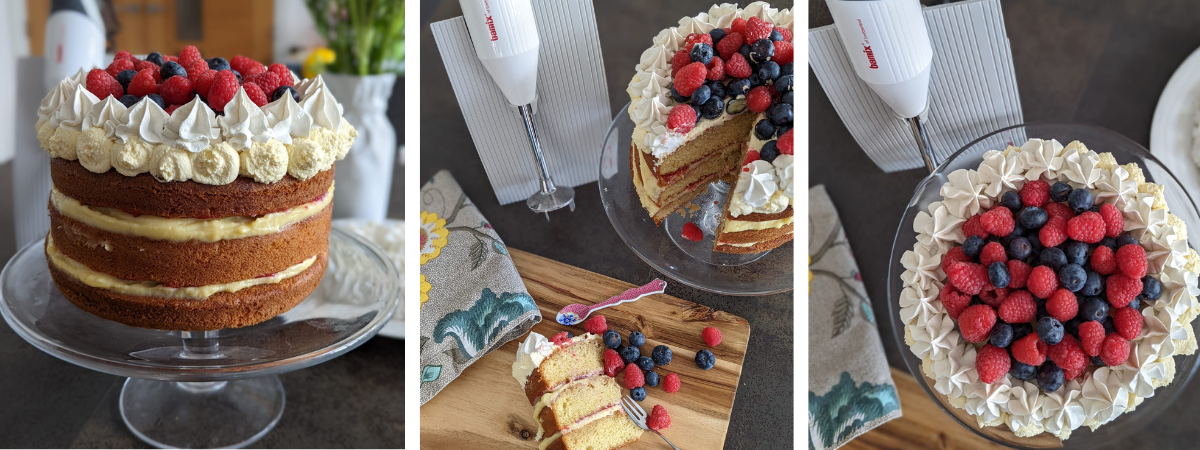
Jubilee Trifle Sponge
Created by Stacey Dees Kitchen (Instagram @staceydeeskitchen)
Think of this cake in different sections and it will be easy to make. You can start making this cake up to 2 days in advance, store it and assemble it on the day. This cake tastes great when brought to room temperature before eating. It even has a slight trifle wobble to it too :)
You will need
Three 8-inch cake tins and liners for the sponge
Bamix for the custard, raspberry jam, cream, and meringue
Sieve
A few jugs
A few bowls
Cling film
Piping bags
Cake stand
Cooling racks
A fridge with space!
Ingredients
For the Sponge
- 300g caster sugar
- 300g unsalted butter at room temp
- 5 large eggs
- 300g self-raising flour
- 1 ½ tsp baking powder
- 3 tablespoons sweet sherry
For the Sherry Syrup
- 125ml water
- 125g caster sugar
- 90ml sweet sherry
For the Custard Filing
- 480ml whole milk
- 1 tsp vanilla bean paste
- 6 large egg yolks
- 150g caster sugar
- 40g corn flour
For the Jelly Filling
- 250g fresh raspberries
- 50g caster sugar
- 1 tbsp lemon juice
- 60 ml of water (split into 30ml and 30ml)
- 15g corn flour
- For the Cream
- 200g double cream
For the Meringue
- 90g egg white (use the whites left over from your custard filling)
- 150g caster sugar
Extras
Raspberries and blueberries
Method
The Sponges
- Grease and line 3 8inch cake tins.
- Turn the oven on to 190° /170° fan assisted.
- In the bowl mix the room temperature butter and sugar until light and fluffy.
- Add the eggs one at a time, slowly mixing as you go and making sure each egg is well mixed in before adding the next.
- Add the flour and baking powder in two sections mixing each one slowly and only until just combined. This will ensure your cake remains light and fluffy.
- Mix in the sherry.
- Divide the batter into the three tins as evenly as possible and use the back of a spoon to flatten the mixture.
- Bake for approximately 20 minutes until the cakes have risen and a skewer comes out clean.
- Leave for a few minutes to cool in the pan and then turn all three cakes out onto wire racks
- While the cakes are baking, make the sherry syrup.
The Sherry Syrup
- In a small saucepan add the water, caster sugar and sweet sherry
- Bring to the boil and then allow to simmer until the mixture has evaporated down to approximately 150ml.
- Leave to cool.
- Poke a few holes in the cake (not through the cake)
- Slowly spoon the cooled sherry syrup over the three cakes (use a pastry brush to gently spread it over the whole of the cake) The syrup will be absorbed into the cake.
- You can now store the cakes until ready to use. Either wrap in foil or put in airtight containers.
The Custard Filling
- In a saucepan with deep sides, heat up the milk and vanilla bean paste on a medium heat bringing it to a boil. Then turn off the heat while you whisk the egg yolks.
- In a large jug, using the Bamix with the whisk attachment, whisk the egg yolks (keep the whites for the meringue) and sugar until thick and creamy.
- Add the corn flour and whisk in completely.
- Pour 60ml of the hot milk into the jug and whisk in (be careful not to let it shoot out of the jug!)
- Pour the eggy milk mix into the hot milk and turn on the heat to medium. Whisk continuously using the blender until the custard becomes super thick. Be careful not to burn the bottom. The mixture thickens very quickly.
- When the custard is nice and thick pour through a sieve into a bowl. This will remove any custard clumps if you have any.
- Immediately put cling film over the top of the mix pressing it gently onto the surface of the custard (this will prevent a skin forming).
- Pop it in the fridge until you are ready to use it. This can be made a day before you need it.
The Raspberry Jelly Jam
- Pop the raspberries, sugar, lemon juice and 30 ml of water into a small saucepan and bring to the boil. Continue to boil gently for a few minutes, until the raspberries start to break down. Turn off the heat.
- In a small bowl, mix the corn flour and 30ml water together until smooth.
- Pour the corn flour mix into the saucepan and, using the Bamix with the whisk blade, blend together until smooth.
- Push the jelly jam through a sieve into a bowl to remove any little seeds then cover with cling film and refrigerate until needed. It will thicken as it cools.
The Meringue
- Heat oven 90° conventional heat (I do not use fan assisted for meringue).
- Using the Bamix hand blender with the beater attachment, whisk up 90ml of egg whites until frothy.
- Slowly start adding the caster sugar one spoon at a time, whisking constantly until all the sugar is incorporated and there are no fine grains left when you rub a little in between your fingers.
- This will take a good 10 minutes.
- Pipe out little kisses onto a tray lined with parchment paper or make a little crown or design of your choice.
- Bake the meringue in the oven for 40mins and then turn off the oven and leave to cool for couple of hours inside.
The Cream
- In a large jug, using the Bamix hand blender, whisk the double cream until it becomes thick and hold up by itself.
- Spoon into a piping bag and use to decorate the top and /or sides of the cake.
The Fruit
- Wash and dry your berries ready to top the cake.

Time to assemble the cake
- The day you want to eat the cake take out all your various elements from the fridge etc.
- Start by placing one layer of the cake on a pretty cake stand.
- Add a layer of custard to the cake and spread thickly and evenly across. It doesn’t matter if it spills out the sides. This just adds to the joy!
- On the second cake add a layer of jelly jam and pop that side on top of the custard layer.
- Repeat with the second sponge so you end up with two layers of custard and jelly with the top ready for the cream, meringue, and fruit.
- Design the top how you fancy. I put the whipped cream on top of the whole cake
- and then added the meringue tiara and filled it with the berries.
- The cake can now go in the fridge until 3o mins before serving.
Jubilee Trifle Sponge Cake…. done!

Website https://www.staceydees.com/
Facebook https://www.facebook.com/Staceydeeskitchen/
Instagram https://www.instagram.com/staceydeeskitchen/?hl=en
Youtube https://www.youtube.com/c/StaceyDeesKitchen/featured